Disclaimer
In true Microsoft fashion, we're kicking things off with a feature that's already had a name change! "Attribute Masking Columns" are now called "Secured Masking Columns". Great start to our A-Z series, huh? The schema name is still
attributemaskingrules
, though, so I'm sticking with it!
Attribute/Secured Masking Columns let you mask specific portions of data based on a RegEx pattern.
Microsoft provides several built-in masking rules to get you started:
- Date with Hyphen : Masks the year in date formats like MM-DD-YYYY, M-DD-YYYY, MM-D-YYYY, M-D-YYYY.
- Date with Slash : Masks the year in date formats like MM/DD/YYYY, M/DD/YYYY, MM/D/YYYY, M/D/YYYY.
- Email : Masks the entire email address.
- Email Hide Name : Masks the name and provider.
These built-in rules are great starting points, but it's also highly extensible. With a bit of RegEx magic, you can mask almost anything!
Sounds pretty good so far, right? Well, there are a couple of significant caveats:
- Only one rule per column : Want to mask emails? Easy! Hide National Insurance numbers? Done! Do both at the same time? Not so fast!
- Column Security Profile is mandatory : You need to create a Column Security Profile and explicitly add users to it. Without this, the entire field becomes masked and uneditable.
-
Not easy to see unmasked
: To view unmasked data, you need to retrieve the entity using the WebAPI with the
?UnMaskedData=trueflag. Microsoft says that "In future releases, there should be a button to allow users who have the Read unmasked permission to read the unmasked values," but as of publication this has not yet happened.
Step One - Enable your column for Column Security
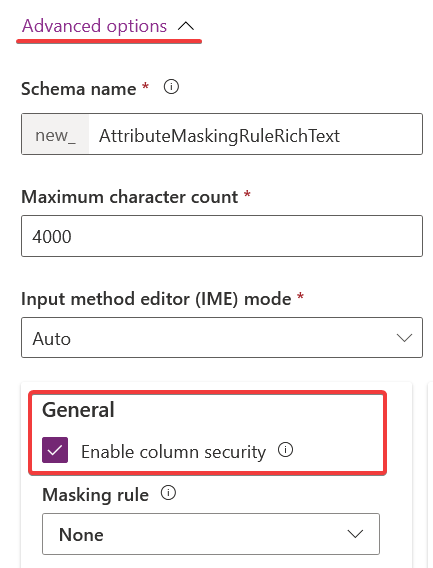
You'll notice an option here to directly set a masking rule, this automatically creates an Attribute Masking Rule linking the Secured Masking Rule to your column. But let's hold off on selecting that for now, and instead create the rule manually to fully understand what's happening behind the scenes.
Step Two - Create a RegEx Secured Masking Rule
Let's create a rule to mask all Unicode characters using this RegEx:
[^\x00-\x7F]+\ *(?:[^\x00-\x7F]| )
We can use this to mask non-ASCII characters in URLs, helping detect IDN homograph attacks . These attacks involve look-alike characters replacing standard ASCII characters, for example, the Cyrillic "а" instead of the Latin "a."
To create a new Secured Masking Rule, head to the Security section under the New menu.
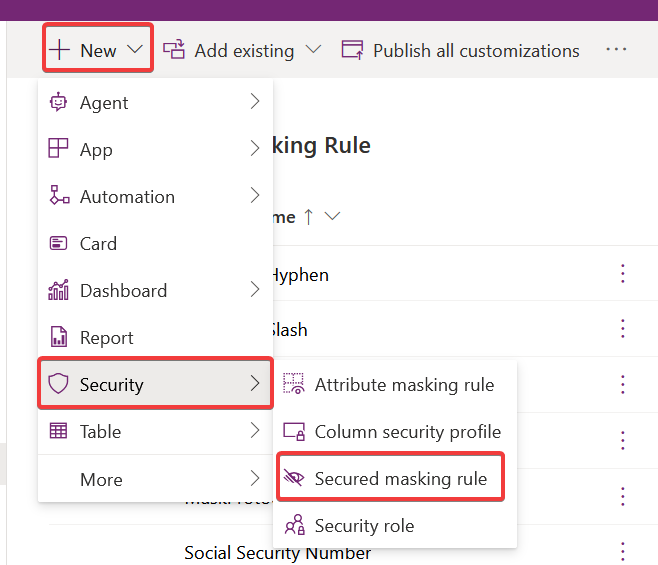
Clicking this opens the rule creation form in a new tab, complete with a handy preview area.
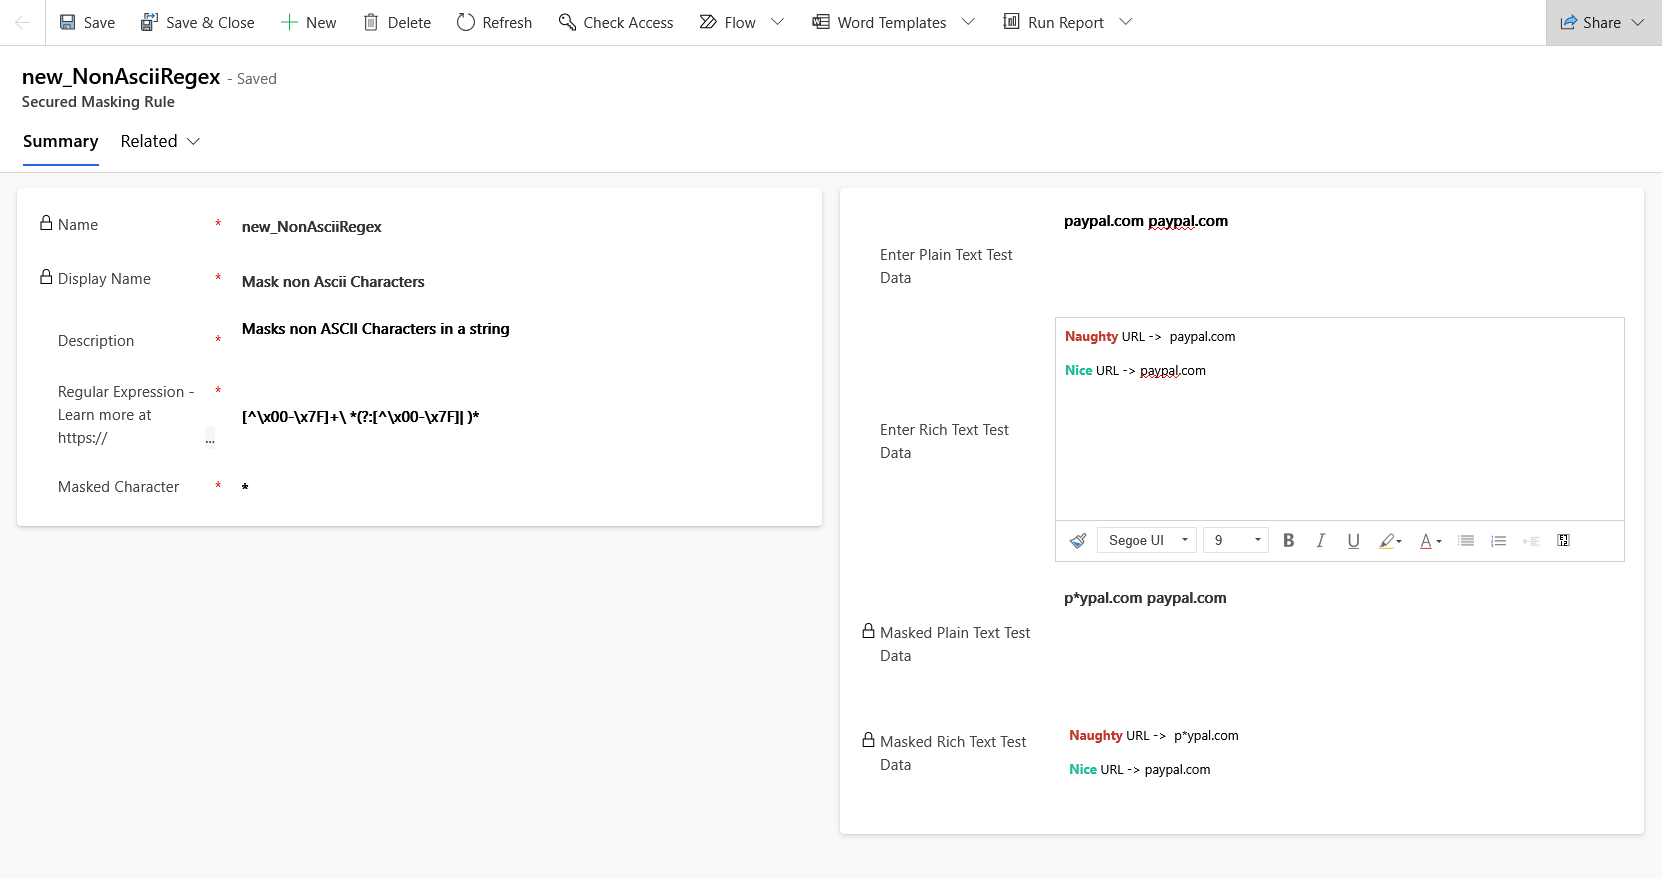
- Name : Enter your schema name, starting with your publisher prefix (note this isn't auto-populated).
- Display Name and Description : Clear and straightforward.
- Regular Expression : Input your Regex here. Microsoft provides a useful reference here .
- Masked Character : Choose your masking character, my go-to is typically an asterisk (*).
The preview section on the right lets you instantly test and verify your masking rule on plain and rich text. As shown, our rule successfully masks the non-ASCII Cyrillic "а".
Step Three - Creating the Attribute Masking Column
Now that we have our masking rule, it's time to apply it to our column. The process for creating an Attribute Masking Column is very similar to creating the masking rule, it opens a form in a new tab.
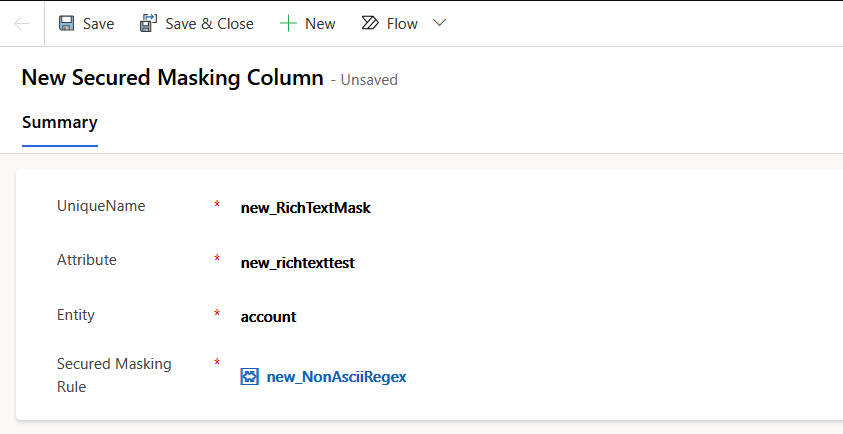
Here again, we need to name the Attribute Masking Column using our publisher prefix, then provide the schema names for both the column and the entity, and finally select our masking rule.
Once saved, the masking rule will take effect.

As previously mentioned, there is a shortcut to creating this Attribute Masking Column. If we look at the advanced settings on our column again, we will see our ASCII rule already selected.
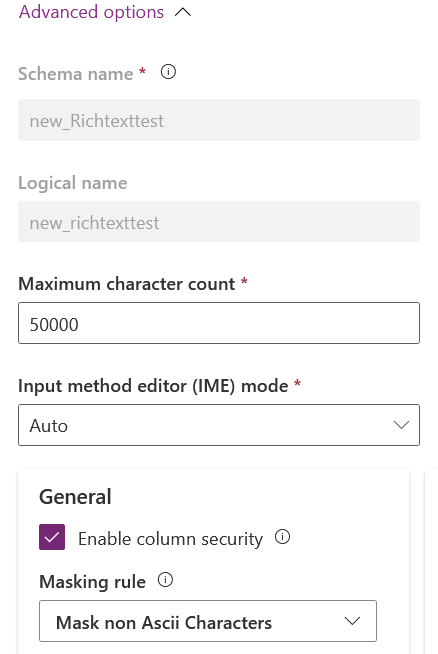
If we were to change that masking rule in the advanced settings and then open the form for the Attribute Masking Column, we would see the updated rule reflected there as well.
At this point, you might think we're ready to push this out to users, but if we did, they might find the field a little more masked than expected, in fact it will be fully redacted. By enabling column security, we've designated this column as requiring extra security. As such, we now need to define a Column Security Profile to control this security.
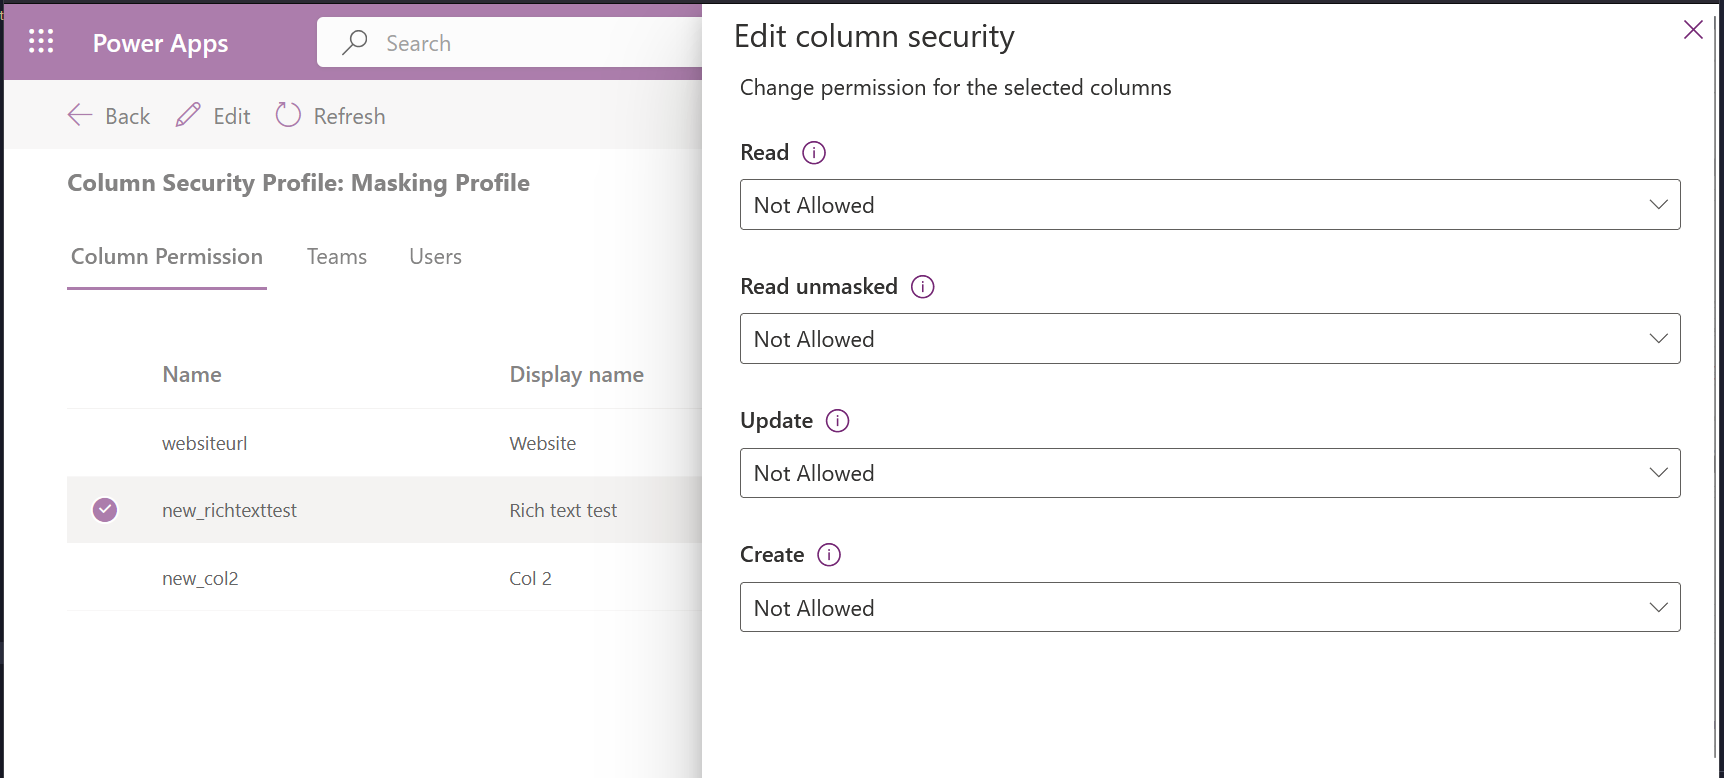
When creating a new Column Security Profile, we can see that by default users, unless they have the System Admin role, will not be allowed to Read the column, either masked or unmasked. Nor can they Update or Create it.
Let's change Read , Update , and Create to Allowed . We can then associate Teams or individual Users with this Profile. Once a user has this Profile, they'll be able to see our column and the masking!
Attribute Masking (or Secured Masking ) is one of those features that sounds great but is a little lackluster in reality.
The good news:
In certain cases, it's the perfect solution. Hiding sensitive data after initial input can be a great way to tighten security in your system.
And with the flexibility of RegEx, you'll be hard pressed to find something you can't mask.
The not-so-good news:
It's still a bit rough around the edges:
- You can only apply one rule per column.
- The "unmasked" experience isn't there yet, with no UI support and only clumsy support via WebAPI, it feels like a chore.
- You’ll need to do some extra security plumbing with Column Security Profiles.
⚠️ Heads up: Not all field types support masking, for example, Lookup columns and Option Sets can't be masked. Only text-based columns (Single Line of Text, Multiple Lines of Text, etc.) are supported.
